John Helms Gallery
My Evaluation of Fredrix's New "Watercolor Canvas"
By John Helms
This is my first attempt at painting on Fredrix's new watercolor canvas.
David Twite of Tara Picture Frames was gracious enough to give me 3 samples
to evaluate, so here goes. ( It may take a few seconds for these images to load. )
Setting up my space for the project...I like to have everything I need within arms reach,
so I won't have to stop painting to get up and go get it. My radio is always set to my
local jazz station. It's too big for this space - I need to move it out of the way.
Step1. Selecting my subject matter from several reference photos.
Step2. When I finally decided what I wanted to paint, I lightly sketched it out on the
canvas using reference material.
I decided to paint a fly fisherman casting in a stream - this is my rough sketch.
The first thing I noticed was that the surface of the watercolor canvas didn't take pencil as
well as paper or board did. Also when I erased with my kneeded eraser, the pressure
of erasing "dented" or pushed the material, so I had to be careful not to apply too much
pressure when erasing.
I transferred the fly fisherman onto the canvas after I drew it on a sheet of tracing paper.
...so I very lightly drew the subject matter in - only outlining -no shading or detailing at all
like I would ordinarily on watercolor paper or board.
Step 3. Time to start blocking in some color - I started blocking in the background trees
first with antwrep blue, cad yellow medium, cad red medium, and sap green then worked
my way down. I was really surprised how my paint beaded up on top of the surface,
I guess due to sizing in the canvas paper. You can't use much water - it'll just sit on
the surface. Since I had to use less water with this canvas, I had to do repeated applications
of paint with a scumbling technique before it would finally soak into the surface.
Step 4. The middle-ground : I drew the outlines of the rocks in the middle ground, and
fore-ground then masked in the fisherman, some water, and the rocks in the foreground
with liquid maskit, which went on with ease because of the slick surface.
Step5. After the maskit dried, I blocked in the water in the stream with alternate strokes
of antwrep blue and yellow orchre. While I was waiting for this to dry, I went back to the
rocks in the middle-ground and added color and more detail. painted in the rocks in the
middle-ground and the water in the stream. Dang! I washed my brush out in my drinking
cup - I drank it anyway....
Step 6. After I took off the maskit, I had to go back over the stream with more color -
the first application only stained the the surface. I found it necessary to go back over areas
I had already painted and sometimes in the process of correcting an area, the paint would lift
of the with only the lightest touch of my brush, which was quit frustrating. I then painted in the
figure of the fisherman and the big rocks in the foreground, and added the tree trunks and limbs.
Step 7. I kept adding more detail and lifting to the fisherman, rocks in the foreground,
and the water until the painting was finished.
Step 8. I'm tired of working on it - it's just not working for me - I'm having to work too
hard to get the effect I want. At this point I think I'll stop.
Summary:
From the first step of laying down the first application of paint , this surface fought me every step of the way. I had to put
twice as much time in on this watercolor as I would have on the same subject painted on watercolor paper or board.
Maybe it's because I'm just not use to painting on a watercolor surface so different from what I'm use to, or if I painted
on it more maybe I would get use to it. All in all, I'd say that this painting was a failure - I didn't like the way it came out at
all -probably due to the lack of control I had because the watercolor canvas wasn't "user friendly"- it doesn't seem to want
to accept watercolor paint and it's resistance to water is the opposite of what watercolor painting is all about. I guess I could
work on it some more until it looked a little better, but what's the point? It just didn't work for me - I'm sorry David and
Fredrix - I really wanted it to work. The brochure that came with it is written and illustrated by Tom Lynch, Fredrix's artist
spokes-person for this new product. I have the utmost respect for Tom - apparently he made it work for him, but when the
directions said to "spray the finished painting with either a gloss or matt fixative", Whooo, Nelly -I'll have to draw the line
right here. Even though the fixative is supposed to "protect" the watercolor from UV rays, will it protect it from water or any
other liquid? I guess I'm just showing my age and not opened to new ideas, but I came from the old school of watercolor
and was taught that the only thing you put over a watercolor is glass - with a mat and a frame, of course, or shrink-wrap it
until the owner can properly frame it. Any fixative sprayed on a watercolor, in my opinion destroys the inherent esthetics
and integrity of the medium itself. And since the wooden frame that it's stretched on is about 1 1/2 inches thick, you would
have to have it custom framed, which would run into some money. I would just paint the edges and hang it unframed.
Watercolor Canvas is also available in the standard stretcher bar size and in panels.
David Twite of Tara Picture Frames is a fine fellow to do business. They have a new line of attractive ready-made frames
which I use with my acrylics and oils. Fredrix , of course, is well-know the world over for their quality stretched cotton and
linen canvases.
Link to Fredrix Artist Canvases: www.fredrixartistcanvas.com
Link to Tara Picture Frames: www.tarafineframes.com/en/default.aspx
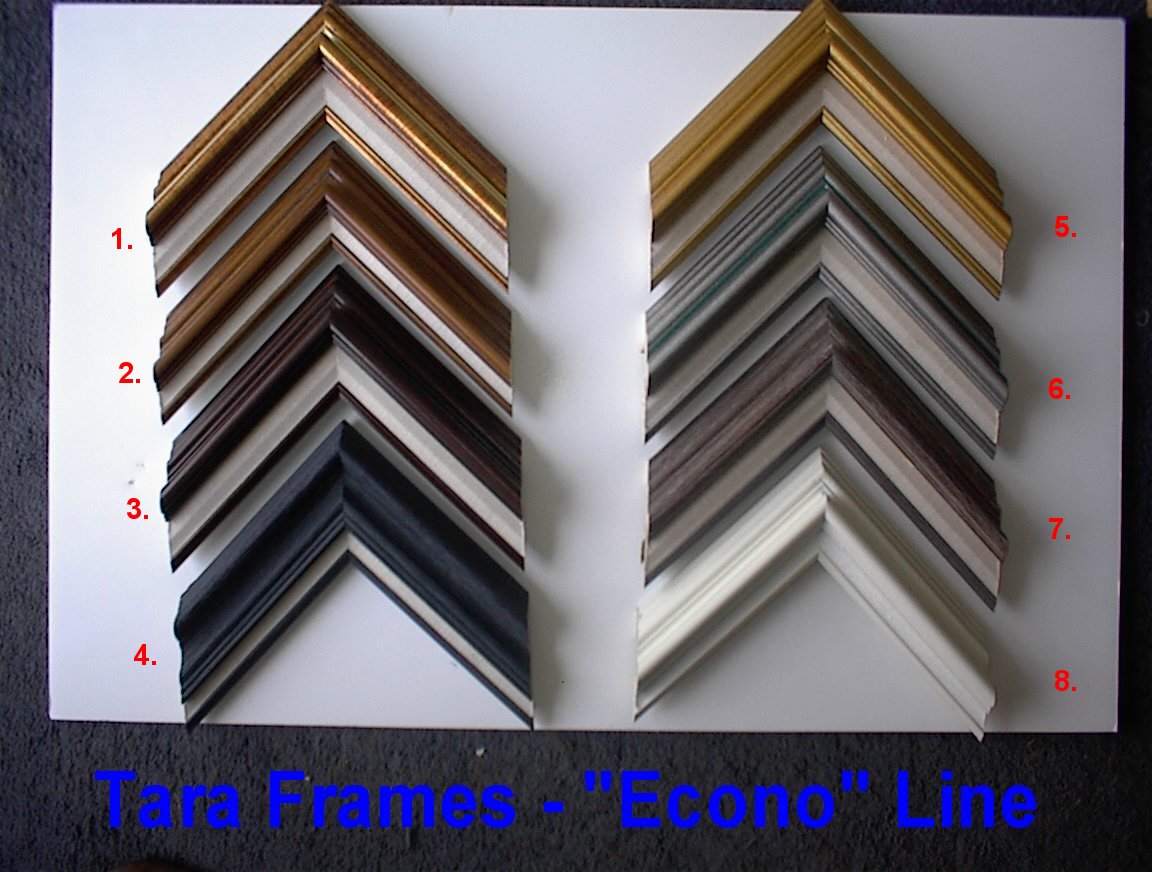
Below are just 8 of Tara's ready-made Frames from the "Econo" line that I use to frame my oils and acrylics. They come in all sizes and are very affordable. The only gripe I have is that the frames below only have a 1/4" rabbit to mount your canvas in ( use canvas clips ) but if you paint on masonite or a similar thin board, it will fit perfect. I'd like to point out here that I'm not getting paid for my endorsement of Tara Frames or Fredrix Canvases - it's just my humble opinion.
All paintings and prints on this website are copyrighted by John W. Helms,
and cannot be copied or reproduced in any manner.
Thank you for shopping at John Helms Gallery
Send email to
with
questions or comments about this web site.
Copyright � 1998 - 2006, John Helms Gallery
Last modified:
08/28/08